This article is an archive from 2019
Archive: 3D printing of waterproof objects for underwater applications
As the general discussion about the watertightness of 3D-printed objects continues, here I will try to summarise the information I collected through the trial-and-error process of creating a 3D-printed AUV. Of course, I will combine my experience with knowledge from others—obtained from the internet, discussions with people from the 3D printing industry, and other makers I met who deal with the same challenges. I expect this article will stay open for a long time and be updated constantly.
Here is a quick disclaimer on the terminology we will use in this article:
PRESSURE
As depth increases, the water pressure increases by around 0.1 bar per meter. At a depth of 5 meters, this so-called hydrostatic pressure is equivalent to 0.5 kilograms of load per square centimeter of surface. The deeper the object is to descend, the more difficult it is to develop seals and design objects that can withstand the high pressure.
CRITICAL PARTS
Parts which must be 100% watertight. Parts which accommodate electronics or cover wires under voltage. Amethyst has two critical sections for now: dry compartment sealing caps and the battery pack container.
NON-CRITICAL PARTS
Parts which do not accommodate anything that should be kept out of water or moisture. For Amethyst these are typically the main hull parts.
Print material
PLA filament can't be used for serious underwater applications without adjusting print settings. If printed objects are intended to last in water for long periods of time, using common settings produces poor results. PLA objects tend to soak up water and, after some time, change buoyancy as a result. No critical parts should be produced from PLA filament without post-processing such as varnishing or epoxying.
PET is watertight by nature (as we know, water bottles are produced from PET). It may not be 100% watertight when objects are produced with 3D printing technology. Standard print settings must be adjusted. Post-processing for critical parts is recommended anyway. PET has better filling performance, and objects from this filament are more durable and stable than those from PLA. Critical parts should be printed with PET-type filaments.
Printing with resin printers
According to the latest research, resin releases substances into the water that are toxic to some, if not most, marine life.
Print settings
You should be able to adjust all settings mentioned below on any slicer you use: Slic3r, Cura, Repetier, etc. You might encounter advice to use more exotic slicers claiming they produce better results for underwater applications. That might work—no problem with that—but my goal is to do the job with widespread / popular tools. I use Slic3r.
EXTRUSION
Extrusion is the most important part of the settings for us. In 3D printing for waterborne apps, the main challenge is to properly join the layers without tiny gaps that usually arise using standard print settings. So the idea is to extrude more filament at once to better overlap the previous layer. The extrusion multiplier can then be increased by 5–10%. It might produce a slightly uglier print, but generally a safer one. Even basic calibration of extrusion to the standard / correct setup will improve the output significantly. Note that any other settings will not help if the extrusion is not set at least correctly.
Before increasing extrusion, definitely check this article: https://help.prusa3d.com/article/d9j1xdg7vj-extrusion-multiplier-calibration
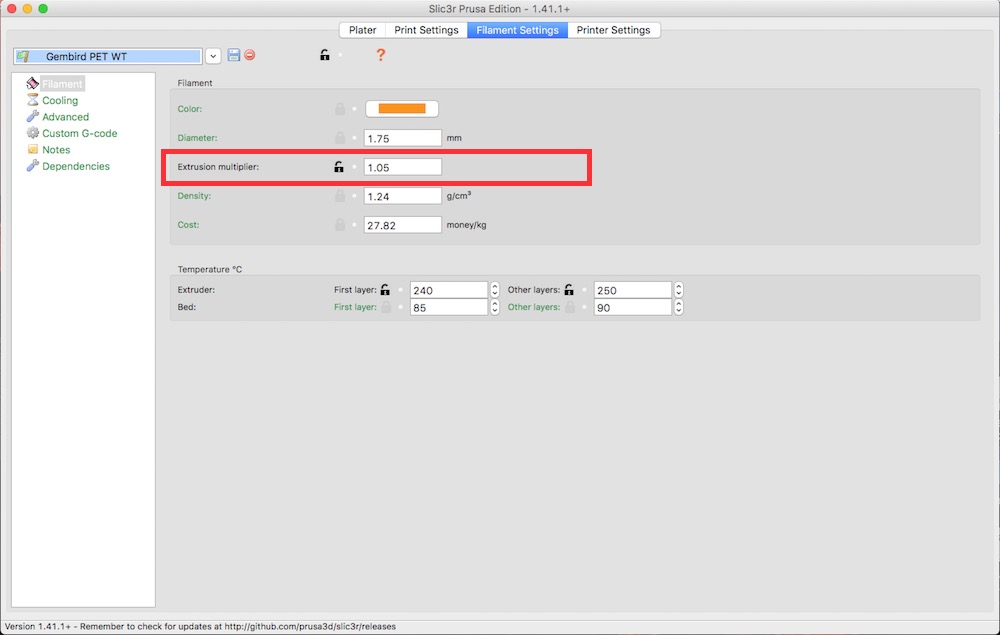
Here you can see a 105% (1.05) extrusion setting. Experiment with percentages up to 110% (1.1) to find the value that best suits your printer. For example, my Prusa printer produces the best output with 110% extrusion.
TEMPERATURE
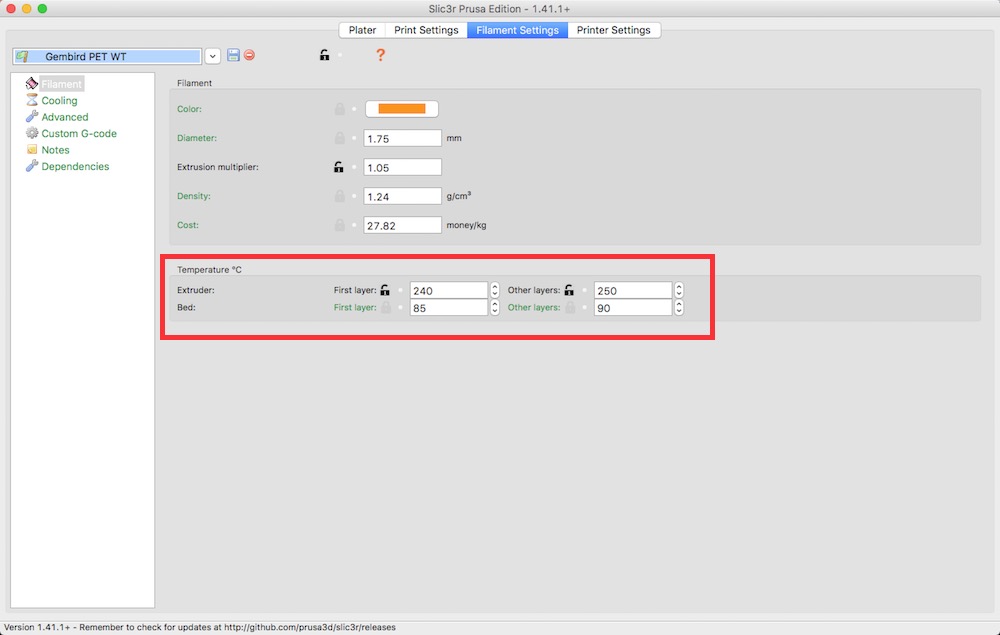
Temperature is the second most important factor for producing proper watertight 3D-printed objects. For all filaments it is generally good to stay at the higher temperature limit of their specific temperature ranges. It will fuse the layers together better and, in combination with adjusted extrusion, this will produce a much more solid surface without gaps. As we all know, each filament producer has its own specifications which differ slightly from other brands. Check them and follow them.
INFILL
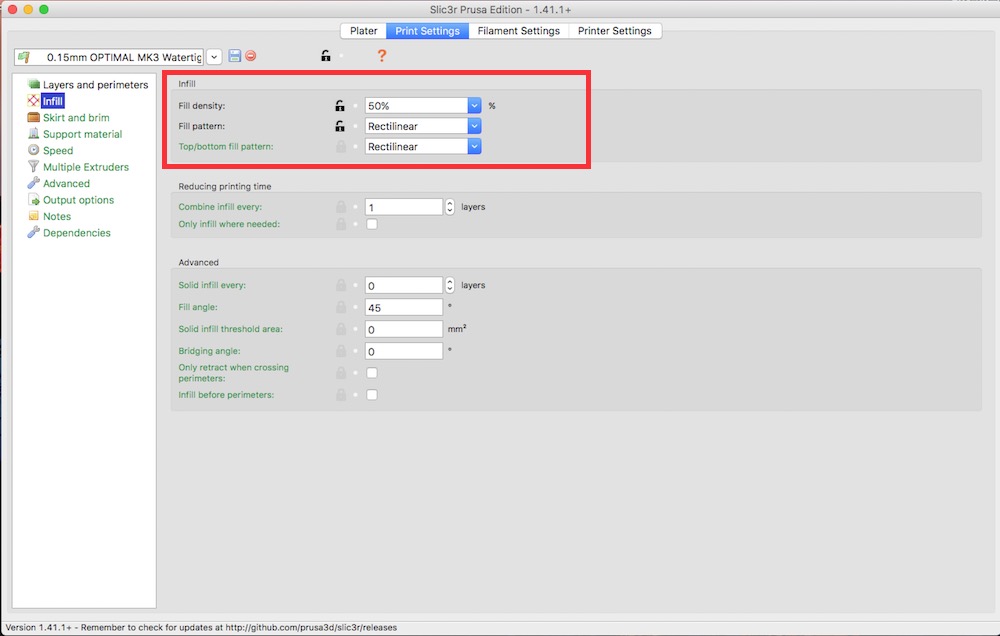
Infill for critical parts should be no less than 40%. It has no direct impact on watertightness, but it makes the part more rugged and therefore more water-safe. 100% infill — a solid object — is recommended for critical parts such as battery packs and sealing caps of the dry compartment. For deeper applications, 100% infill will keep you on the safer side (remember: still not completely safe) even for ordinary, non-critical hull parts.
Z-AXIS SETTINGS
This has an impact on watertightness as well. A correct first layer is a must as the base for every print. Check this article—just from the pictures you will see why it's important: https://help.prusa3d.com/article/ZhBlGFD9Ah-live-adjust-z
PERIMETERS AND FIRST/LAST LAYERS
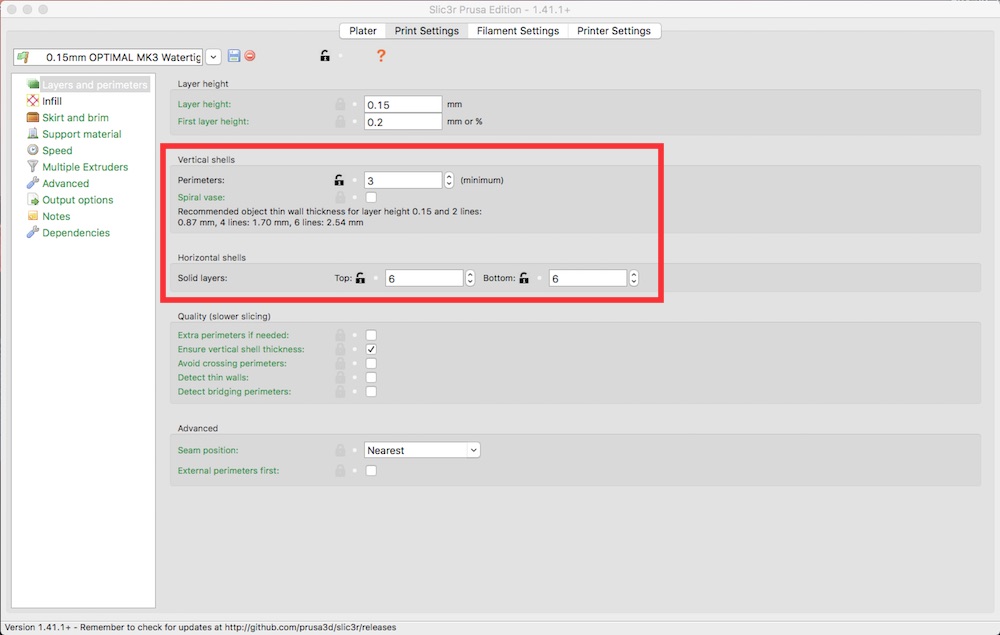
The outer shell of the part should have at least 2, preferably 3, perimeters (wall thickness). The bottom and top of the part should have 4–6 solid layers; sealing caps and battery pack covers could have even more.
PRINT QUALITY
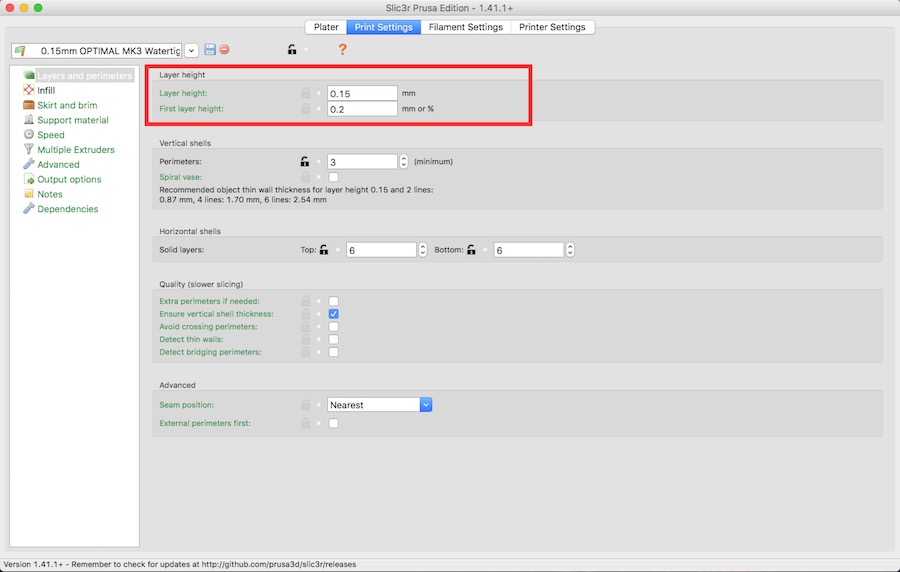
Print quality matters — higher detail means better joining of layers and therefore better watertightness. For critical parts, use a layer height no greater than 0.15 mm. Some instructions I have seen online say the opposite: that a thicker layer means fewer joints and therefore fewer potential leaks. In my experience, however, better quality gives better performance.
Post-processing
VARNISHING
Parts can be finished by coating them with varnish or paint. Be careful: ordinary varnishes are usually not tough enough to withstand the greater pressure of deeper water. Relying on varnishing alone is not a good way to solve the problem. Ordinary varnish can only improve performance.
EPOXYING
It is a good idea to apply a layer of epoxy glue to critical parts such as sealing caps and battery pack covers. Epoxy is a tough, salt-water-resistant solution. It will definitely help correctly printed parts withstand greater depth pressure.
Testing
Before any serious use of critical parts, there must be a test. A basic one is to fill the part with water and check for leaks. Remember, water under pressure represents far more force than when you just fill the part with water. A field test—parts without electronics—must be carried out to find the maximum depth that your setup is capable of diving to safely.
Warranty
Finding the best setups for 3D printing seawater-borne parts is a constant process for me. I continue collecting all available information about materials, settings, and printing techniques to get the best possible watertight and pressure-safe output. All provided settings for each part of Amethyst AUV are believed to be the best for now, but they are still without any warranty. I appreciate any experience anyone can share with me and encourage you to challenge any piece of information provided here in this article and at the Beobachtung site.
Sources
Gehäuse aus dem 3D-Drucker | Make: magazine 2/2019 - paid online version
Extrusion multiplier calibration | prusa3d.com - online article
The first layer calibration | prusa3d.com - online article
3D Printing: Make Water Tight and Air Tight Containers | instructables.com - here